| |
|
| |
| Streaming Audio on a Teamspeak Server |
| |
For more advanced streaming configurations please click here.
|
| |
Streaming the audio from your scanner can be as simple as plugging a cable into your speaker or record output on your scanner and then into either your microphone or line input on your computer. We will discuss several methods for accomplishing this, since there is no one way that always works.
|
| |
The simplest way to stream your scanner on a Teamspeak server is to plug into your scanners line (record) output jack. This is usually a 1/8" mono jack, but may also be a stereo output. A Uniden 785, for example, is a stereo output. Regardless of the type, plug the appropriate cable into the Line In on your computer.
|
| |
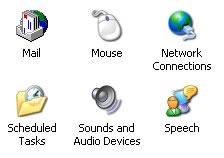
Next, if the volume control on the scanner also controls the Record Out volume, as is the case with a Uniden 780, set the volume of the scanner to about 10 o'clock (40%). Once you have done this you will need to launch your Windows Control Panel and then select Sound and Audio Devices.
NOTE: If your scanner doesn't have a Record Out, use the Speaker Out and you will be able to listen to the scanner through your computer speakers. You may need to plug into your computers Mic In, but try the Line In first. |
| |
|
| |
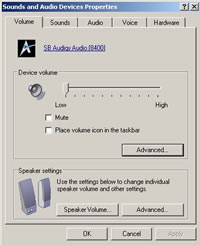
Double-click on this icon to launch the Sounds and Audio Devices Properties. In the center of the box is a button labeled Advanced. Click on this. Then in the top-left corner click on Options -> Properties -> Recording. This will present you a list of devices that you may record from. Make sure that you have enabled both Microphone and Line In (Analog.) Click Okay. |
| |
|
| |
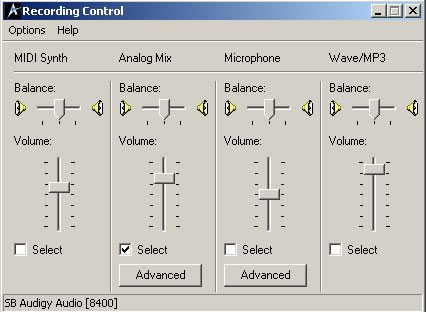
This will launch your mixer control. Locate your Line In (Analog) setting slider and adjust it to about 50% or slightly higher. This setting will vary based on your scanner level. Make sure to select the device by placing a check in the box.
NOTE: If you are using the Speaker Out from your scanner you may need to plug into the Mic In. But even if you are using the Record Out from your scanner you may still need to plug into the Mic In. This will be trial and error. If this is the case, make sure to adjust and select the appropriate device.
Once you have completed this step close the dialogue box. |
| |
|
| |
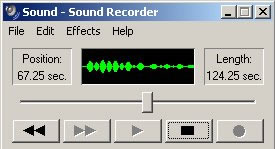
At this point you should be close in your adjustments. To make final adjustments click on Start -> Programs -> Accessories -> Entertainment -> Sound Recorder. This will launch your Windows Recorder. Find something on your scanner that is active, such as Weather and then click on the red record button. Adjust your Windows Line In or Mic In (above) to give you an audio form filling roughly 50% of the recorder window. |
| |
|
| |
Make sure the the audio form isn't squaring off on the tops, since this is a sign of clipping and clipping is distortion. If you are using the Speaker Out on your scanner you may need to find a balance between the scanner volume control and the Windows Record control. Trial and error, but easy enough to do. For even more accurate level settings you may use a third-party application, such as Cool Edit Pro. This is our preference, since it will also show hum on your signal very nicely. |
| |
|
| |
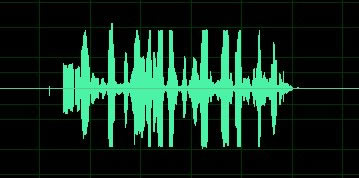
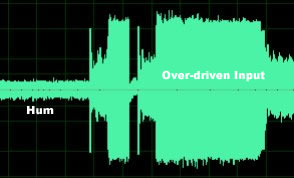
Below is an example of 1) Hum on the lead/trailing edge, and 2) an over-driven signal.
|
| |
|
| |
In the above snapshot from Cool Edit Pro, note that the leading and trailing edges are flat lines. This shows that there is no hum on your signal. In this example, our settings were such as to record at about -6dB. Almost without variation, Windows will begin clipping at -6dB, even if your signal is clean at 0dB (preferred in recording applications.) Don't question why, just set it for about -6dB and everyone will be happy :)
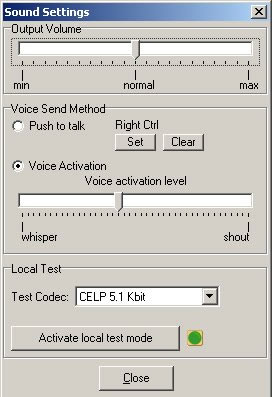
This should pretty much take care of basic settings for audio. Next, we need to set your trigger level for Teamspeak. This is done by clicking Settings -> Sound Input/Output Settings -> Sound Settings. |
| |
|
| |
Select Voice Activation and then set the slider to just below 50%. With a signal present on your scanner adjust this setting to turn off the green light in Teamspeak on your feed when no signal is present on the scanner. |
| |
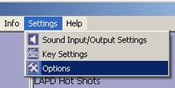
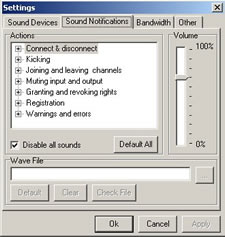
The last step is to turn off Teamspeak sound notifications. These are the sounds that are made whenever a user enters or leaves a channel, or does various other things. If you are streaming your computer will echo everything that you are hear -- including these annoying sounds. It is very simple to turn off sound notifications.
Begin by clicking Settings -> Options -> Sound Notifications. Down at the bottom-left is a checkbox. Click this to disable all sounds. Exit the dialogue box and you are all set. |
| |
|
| |
A final note on streaming. If you are in a channel that is Moderated, as indicated by a (M) next to the channel name, you will not be able to stream in that channel unless you have been granted 1) Voice by a CA or SA level user, or 2) have been granted CA by a SA level user. A SA is a server administrator and controls the entire server. A CA is a channel administrator and controls the channel.
|
| |
| Hum Control |
| |
The most common complaint that you will hear initially is about hum on your signal. This is most often caused by using the Mic In when you should have used the Line In, or vice versa. It may also be because you have your Line IN or Mic In too high and your scanner volume too low. This is referred to as incorrect stage gain. The higher your Line In or Mic In levels, the more noise that is amplified. Other causes of hum are poor cables and ground loops. For detailed information on other ways to cure ground loops click here.
In some cases the source of hum will be a cable that is too long. The cable acts as an antenna and may pickup electrical hum or computer noise. Use a shorter cable and one of higher quality (better shielding.) You may also need to convert to balanced audio lines and we will discuss this aspect of connection in the advanced section. |
| |
| Too Much Audio |
| |
In some cases your audio source may just be too high for your computer to handle. One solution for this is to purchase a signal attenuation patch cable from Radio Shack (shown here.) This will allow you to lower the signal level but may require that you switch from Line In to Mic In. Once again, trial and error. Signal overload will also contribute to hum.
If you are technically capable you can make your own attenuation cable by inserting a 47k ohm resistor in line between your Speaker Out and Line In connection. If you are using the Mic In connection use a 470k ohm resistor. |
| |
For more advanced streaming configurations please click here. |
| |
| About The Author |
| |
Bob has been involved with radio since the age of 12 when he got his first tunable multi-band portable radio. Later he obtained his amateur radio license. After college Bob joined the Army as a Military Policeman and after 6 years left to join a civilian police department.
Prior to getting hired, Bob worked as a radio technician. Eventually, Bob was hired by the State of California and then the County of Los Angeles. After 12 years he was injured on the job and entered into the world of computer programming and audio applications. For many years, Bob did both but concentrated on audio engineering. His work has been heard on many televised programs and his name appears in the credits. Bob now owns a successful web hosting business. Bob is the owner of a dedicated Teamspeak server set aside exclusively for streaming audio from scanners around the world. Bob also owns and operates the Scanner Buff Network, a free incident paging service.
During his computer programming years, Bob authored a once popular program called, Scanner Buff. Scanner Buff was one of the first mainstream database programs that allowd scanner enthusiasts and hams to database radio frequencies -- long before serial controlled scanners. |
| |